I had to scrap the idea of doing a very smooth glaze finish for the gold panels because it just was not happening. Who knows why a technique does not always work the way you know it should, but it just was not meant to be. I did a soft ragged finish with the gold toned glazes instead, and in the end, felt this was the better choice. It added some interest to the panels and gave them a little depth.


Remember, those off-white "beams" will be aged to match the dentil molding and fireplace.
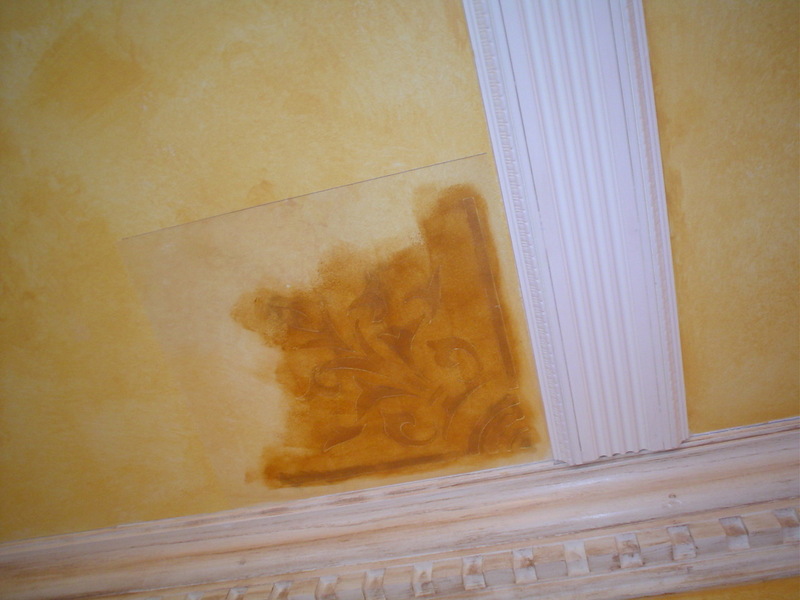 Now that the glazing is all done, onto the stenciling! I cut my own stencil for the corner design. It’s a simple, one overlay.Here you see what it looks like, just before I remove the stencil. I use a low tack, removable spray adhesive to adhere to the ceiling while stenciling. That’s all you are going to see of the corner stencil design for today, because as soon as I finished stenciling all four corners in each panel, I started getting the center panel ready to apply the Modello™ and I forgot to take another picture of the finished corner stencils.
 I drew a chalk line across the center of the red panel and marked the center point of the line. Now I am ready for placement. I will say, all this would have been much easier with 2 people, vs. just me. It also would have been easier to do on my small scaffolding, but that desk weighs a ton, and I wanted to spare anyone the task of having to move it. There was just not enough room to maneuver the scaffolding, so I opted for the ladder. Also, because I do so much work in this house, I always try to keep costs down and do all the work myself, vs. hiring someone to help me. Now, as soon as I tell you that, you will see on Monday I will have my friend Stacy helping me out with the Sun Room ceiling. First, I am afraid of heights, and cannot reach the highest part of that ceiling, and second… we are bartering hour for hour. I helped her do some gold leafing one day, so she would help with my tall ceiling. 🙂
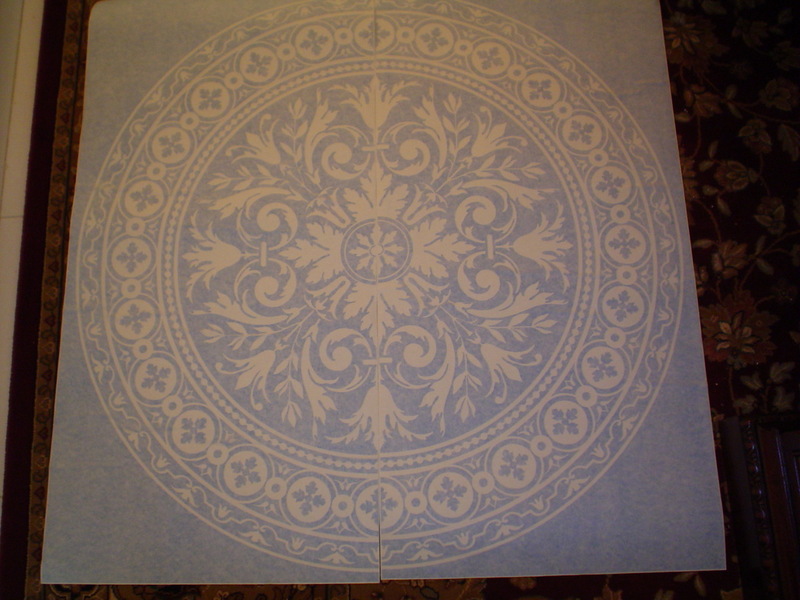
Here is the Modello™ I will be using… out of the box, and lying on the floor! 🙂 It is the Ornamental Center, #128. The Modello™ is comprised of 3 layers: a backing, the design element layer, and the top, cover piece. When you order a Modello™ from Modello Designs, you also receive a burnishing tool, some smaller test pieces to play with, and complete instructions. This design is 36" in diameter and comes in 2 pieces to make the full circle.
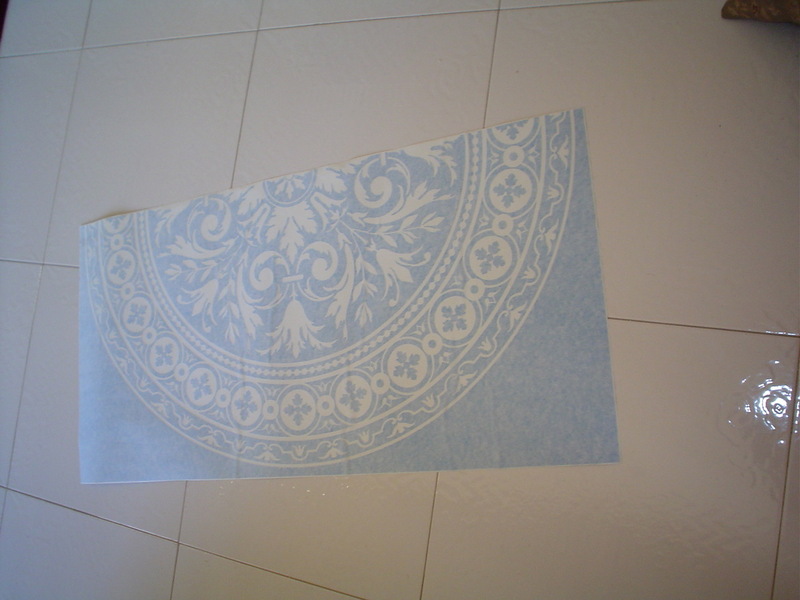
After fooling around with it a bit and assessing my situation, I decided it would be much easier if I cut it into 4 pieces to work with. If I had a second pair of hands, this size would have been fine. Also… I must admit, I am a little scary when it comes to trying to use contact paper, so I did not want to take a chance with the application of this design on my nicely glazed ceiling panels! Stay tuned….


