I said yesterday, that I thought I would finish this ceiling today, but I just ran out of time. The biggest hold up for me today was trying to wipe off the original pencil marks Stacy and I put on the ceiling when we first started measuring out the border. That day, neither of us had a piece of chalk with us or a watercolor pencil. When marking out something like this, I prefer a watercolor pencil, close to the color I’ll be using, since when wet, it blends right in. Well, in the end I found one pencil, which I had to break in half, so we could each have a pencil to work with! The next day we decided to change the border and this time used a chalk line to lay down the new lines. Now I am paying the price for those pencil marks on the plaster. They are coming off, but with quite a bit of elbow grease. :-( This task was slowing me way down, so I left some for later and moved onto adding the highlights to the scroll border.
I am going to post two photos of the border below, side by side, with and without the highlights. You can see what a difference a few extra strokes with a liner brush, makes!
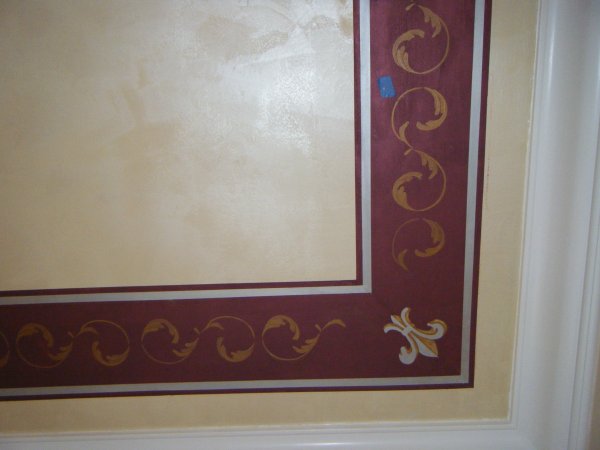
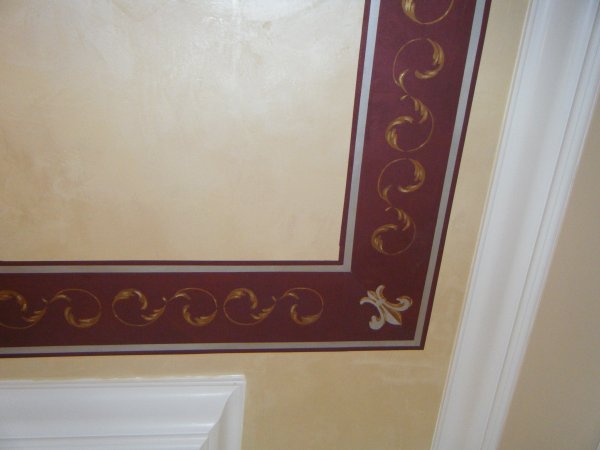
The picture (above) on the left is before the highlights. If you click on them, it’s clearer to see. The picture (below) on the left is with the highlights.
On to the medallion…. Now it is time to add the stenciling. Again, I am using a wonderful design by Melanie Royals. I’ve had the Palazzo border stencil for several years now and have used it many times. The stencil I used for the medallion is one I just purchased, but I noticed today that it had the date, 1997, stamped into the mylar. What I love about Melanie’s designs is that they are classic designs and truly stand the test of time. I always feel her stencils are a good investment because I know I will use them repeatedly over the years.
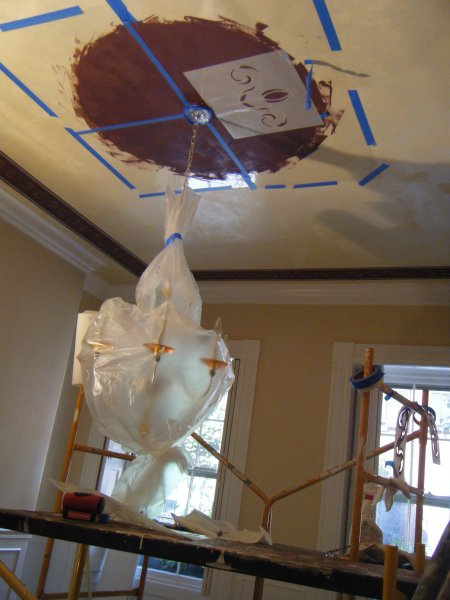 This stencil design has 2 overlays and I am doing 4 repeats to complete the medallion. This shows the 2nd overlay up and ready to stencil. I still have the chandelier wrapped because even though the messiest part is now done, I am sure to spill some paint on it if I dare remove that plastic before I am truly done!
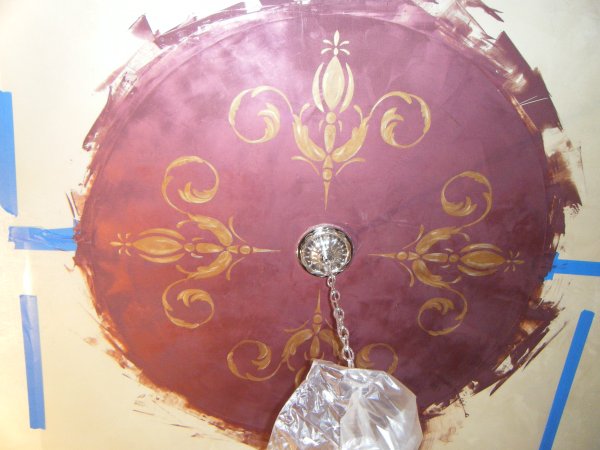
I had intended to add a 3/4" wide silver border, 1/2" from the edge of the circle. For days I have been struggling with this idea, feeling it was just not going to look right, but yet not able to come up with another solution. I want to bring in the same silver that is in the border and to also tie this into the silver found on the chandelier. As I was cleaning up the area and getting ready to leave today, it finally came to me! I am going to create a bead border stencil, stenciling this in silver about 1/4" away from the edge. You’ll see what I mean when I next return to this job site . There is also going to be a little more work going on in this room that I will discuss tomorrow!

